Monday, November 26, 2012

Three Speed Cable Installation

Three speed hubs are shifted much like indexed derailleurs, using a special cable with a barrel attached to either end. It's fairly common for these cables to seize up with rust, so I'll show you how a new one goes on. The bike I'll be working on has a Shimano 333 hub with a twist grip shifter. First you remove the shifter from the bike if it's still attached (on this shifter you unscrew the two screws on either side):


Now you can disassemble the shifter, just don't lose any parts (especially the ball bearing that controls the shifter's indexing):


Now install one end of the cable onto the shifter's core piece:


Let the cable sit inside the channel:


Reassemble the shifter around the cable, paying attention to where the ball bearing sits:


Screw this barrel into the shifter once the two halves are back together:


Now you can slide the shifter onto the handlebars. You should tighten the clamp screws so that the shifter stays in place. This shifter also has a third smaller screw on the bottom to adjust the twisting resistance. You can adjust this screw after the shifter is secured on the handlebars:


Now you have to secure the other half of the cable to the frame. This bike uses a removable clamp to hold the cable in place. Basically you need to find a position that takes most of the slack out of the cable once you screw it onto the hub's pushrod lever mechanism:


Once you find a good position for the clamp you can tighten it down. Here's an overview on how to adjust the shifting:


There will usually be a red circle or a pointer arrow on the lever that the cable attaches to. This arrow needs to line up with the indexing notch when the shifter is in the middle gear. You can use the barrel adjuster to fine tune this adjustment. If you don't have enough threads on the adjuster to line up the arrows, then reposition the chainstay clamp to give yourself more room to adjust the cable. That's about it. These hubs usually have an oil port, so fill it with a little oil every now and then (gear oil would be just about perfect, but motor oil or automatic transmission fluid will work well too).

Monday, November 12, 2012

Threadless Headset Overhaul

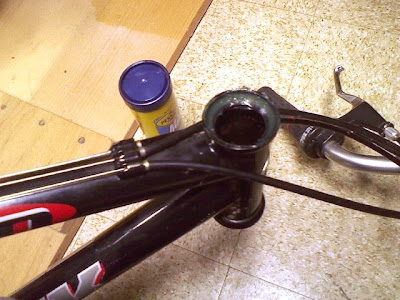
Until now I've only shown how to service threaded headsets. Most newer bikes have a different setup where the stem clamps onto the fork's steerer tube. Here's what a threadless headset looks like:


This is a stronger and lighter system than the old threaded setup, and slightly easier to service too. Shown here is a basic Dia Compe Aheadset on a Trek 930. The first step is to remove the top cap bolt:


Now you can loosen the side clamp bolts. If there's more than one then loosen each bolt in half turn increments or less:


The stem will slide right off at this point. Carefully lay it aside so you don't kink the cables:


Now remove any headset spacers:


Here you'll notice a plastic ring wedged inside the top bearing race. Sometime you can just shove the fork out of the head tube at this point. If there's too much resistance, then gently pry up on the bearing race to lift up both the race and the plastic ring. Afterwards if you push the race back down, you can slide the plastic ring off:


Now you can easily slide the fork out:


Time to clean out the bearings and add some fresh grease to the frame cups:


The fork goes in the same way that you removed it, so carefully slide it back into the head tube:


Wipe off any grease from the steerer tube, then replace the top bearing race:


And the plastic ring:


Now the dust cover:


Then the spacers:


Finally the stem:


Don't tighten the clamp bolts yet. Instead replace the top cap and tighten down the bolt:


This is the tricky part because this bolt sets the preload on the headset. I like to make it nice and tight at first in order to seat the headset parts together, then loosen the bolt until the fork turns freely without play. Only after this bolt has the correct tightness should you align the handlebars and tighten the clamp bolts:


These bolts will lock in the headset's adjustment, and basically secure the fork to the frame. Tighten them evenly in 1/4 turn increments so that the gap in the stem is the same by each bolt (if there's only one clamp bolt then just make it nice and tight). That's it, no big wrenches to fuss with or stuck quill stems to deal with. The only tools you need are allen keys.

Saturday, November 10, 2012

Bike Pedal Overhaul

My pedals wouldn't turn easily, so I thought I'd clean the bearings and give them some fresh grease. Most inexpensive pedals are similar to these, and can be taken apart with a screwdriver and a socket wrench. These particular pedals have an aluminum cage that's screwed onto a plastic body, so I had to remove the cage to access the bearings. First I removed the reflectors, these were held on by 8mm nuts:


Now I could remove the cage screws. It's important to use a tight fitting screwdriver bit for these because they strip easily (a #2 philips bit fit these well):


Now you can pull off the cage and pry out the center cap to access the bearings:


On some pedals the center cap screws onto the pedal body, so if it has flat sides to put a wrench on then keep this in mind. Anyway inside there will be a nut, a keyed washer, and a bearing cone. You need to remove the outer nut first with a socket wrench (this one is a 12mm nut):


Next you can pull out the washer and unscrew the bearing cone:


 Now the pedal body will slide off the axle:


Clean all the bearing surfaces (including the axle) and repack them with fresh grease:


Carefully slide the pedal back on and screw in the bearing cone. I just turn it in until the bearing play disappears, then replace the washer and tighten down the locknut. If the pedal feels gritty as you turn it, then you should loosen the locknut, unscrew the cone, and retighten the locknut. Once you're happy with the way it spins you can reinstall the cage and anything else you might have removed (like reflectors or toe clips):


As long as you have the right size socket to fit the locknut this is a fairly easy procedure. You should really only re-grease your pedals if they were submerged, since most will have long happy lives without any attention whatsoever. Oiling the bearings once a year or two should be just fine from a maintenance perspective.