Saturday, August 3, 2013

French Bike Teardown

Here's a late 70's Motobecane Nomade I recently brought home:


It almost looks rideable as is, but I would never trust a 35 year old bike without doing a little work on it first. I don't like this seat anymore...


I typically start removing the stuff on top first, and work my way down to the wheels. This bike has stem shifters, so I needed to loosen the clamp before the handlebars could come out:

Now I can loosen the stem bolt and remove the bars:

I guess I was pretty lucky that the aluminum stem actually came out. Sometimes they can chemically weld themselves in place.

Time to remove the fork. I was too lazy to grab my big adjustable wrench for the locknut, which is why you see me using channel lock pliers. Don't use them on a really nice bike...

The top nut is off, but now the brake hanger is in the way:

Off with the front wheel:

Now I can squeeze the brake pads together to get some slack in the brake cable, and slide it off the hanger:

Reflector, hanger, and spacer removed:

The top bearing race is the last piece to remove. It should just unscrew by hand, revealing the bearings underneath:

After the headset is taken off, the fork just slides out:

Removing the brake for cleaning:

Ewwwww...

Time to do the cranks. These covers unscrew with a quarter or a penny pretty easily:

Now you need a socket to fit the nut inside the crank (for square tapered cranks):

With the nut removed the crank still won't come off. You need this special tool:

Right crank removed, yay! Just repeat for the other side.

Bye bye rear wheel:

The chain needs some cleaning, so I used my special tool to remove it:

Now the bottom bracket needs some love. First remove the lockring (this one was actually pretty tough for once):

The adjustable cup might unscrew by hand, but in this case I had to use this method again:

If you own a bike shop you could use a Park Tool pin spanner, but the needle nose pliers get it done all the same. Here is the spindle removed:


The right side cup on a French bike will be normally threaded (not left hand threaded like most other bikes). On this bike that bearing cup was seized in place, so I left it alone. I'd rather not have it loosen up on me later anyway. 

Moving on, the brake cables can be disconnected from the levers fairly easily. You just need to unhook them from the barrel inside the lever:


Here is the frame as it sits now:

I didn't remove the derailleurs or cables because they actually seemed to move fine. These Huret derailleurs have pinch bolts that fray the end of the cable, so if you remove the cables then you don't get to reuse them (it's almost impossible to thread them back through the tiny pinch bolt again). If you ever worked on an old Schwinn then you'll know what I'm talking about. My next post will cover reassembling the bike in better working order. Cheers!

Friday, June 14, 2013

Derailleur Hanger Repair

Impacts to a bike's rear derailleur can bend the derailleur hanger, which is the piece that attaches it to the frame. Most mountain bikers have probably seen this happen, as well as anyone who routinely drops their bike on the drivetrain side:
.
Notice the angle on the derailleur's cage? It might be tempting to just pull it back into shape, but that will only make things worse (you might bend the derailleur instead of hanger). The real solution is to remove the derailleur:

You usually only need a 5 or 6mm allen key to do this, and you don't need to remove the chain or the cable. Just let it hang while you fuss with the hanger:

Park Tool makes a very expensive alignment tool, and a competent bike shop mechanic would be able to do a precise job realigning the hanger, but an adjustable wrench works pretty well too:

I just gently bend it out until the derailleur lines up straight again. It helps to have a good feel for how metal bends, but just be careful and patient and you can probably get it straight:

I wouldn't do this to a high end racing bike, but for any normal bike this should be just fine. I've repeatedly bent the hanger on my Trek mountain bike without breaking it, so no worries on a steel hanger (heat treated aluminum might be a bit iffy though). The last step is to check the gear indexing and adjust the set screws if necessary.

Thursday, June 13, 2013

Weird Bottom Bracket

I got an old Austrian made Sears cruiser and thought this was odd:


Only one crank has a cotter pin, while the rest acts like an American style bottom bracket in an English shell:


You can see the big nut that holds the bearings together like a one-piece BB. After removing it, you can see that the right crank and the spindle are one piece, and the shell has small press-fit cups inside:


Friday, May 24, 2013

Mountain Bike Rebuild

Ok now it's time to put the Hardrock back together. My goal here is to make it work like new, while spending little or no money on it. A bit optimistic, but it can be done. When you restore an old mountain bike, be prepared to buy new brake pads, cables, and tires (especially if you have old skinwall tires. These always seem to tear at the sidewalls for some reason). You probably wont know what you need until it's all torn apart, but this one doesn't look like it got too much abuse so I might be ok.

Let's start with the fork. Clean all the headset bearing pieces, then pack them with grease:

Now you can reattach the fork to the frame. Make sure the bearing cages are facing the cups the right way (as shown above), or else the cages will just grind around inside the cups.

You need to make sure the threads on the fork are clean and don't have any grease on them. I also added some blue threadlocker to keep the headset from coming loose when you actually go mountain biking. 1-1/8" headsets don't really have this problem, but these old 1" forks get loose after a few hours of rough trail riding. You should screw the top race on until fork play disappears, then unscrew it a tiny bit. Now you can tighten down the locknut:

I used a mop handle to brace the fork while tightening the nut. It needs to be really tight, but unfortunately you can also strip out the threads in the locknut if you overdo it. I guess experience will tell you when to stop. Moving on, I installed the handlebars:

One neat trick about having the cables all loose is that you can slide the housings out of the way and put some light grease or oil on the inner wire:

Then you can just slide the housing back in place and clip it back into the cable stop on the frame. With the brake cable and cantilever studs lubricated, I reinstalled the brake. The screws that hold the brakes on shouldn't be overtightened, or else the brake will bind. It's a good idea to add some threadlocker to the screw threads, and they often come with it from the factory. Also, keep track of which hole you attach the brake's springs to. They need to match on both sides, otherwise one of the pads will always rub the rim.

Let's do work on the bottom bracket now. I dealt with the surface rust inside the shell with some Lime-Away, and then a coating of marine bearing grease to prevent future rust. I also soaked the bearings in mineral spirits to get the caked up dirt and rust out of the cages:

Next I packed them full of grease and placed the bearings in the cups:

It's nice to use a thicker grease here because you really need the bearings to stay in place as you screw the cups back into the frame:

It's important to grease the threads in the shell and make the right side cup very tight. Next you should screw the left side cup in until you can't turn it by hand anymore, then secure the adjustment with the lockring:

Check for play or binding in the spindle afterwards. It also helps to oil the lockring's threads to keep the cup from turning with it. Now the cranks can go back on. These are held on by 14mm nuts. Make these nice and tight, you really don't want them coming loose. I used my $10 Harbor Freight torque wrench set to 27 ft-lbs on these:

You certainly don't need a torque wrench to work on old bikes, but since I have one now why not use it?

Before reinstalling the rear derailleur I dripped some oil in the pulleys:


With the wheels and seat back on it's starting to look like a bike again:

Time to adjust those brakes. The cable clamp on the brake itself is sort of like the coarse adjustment for the brake. You want to clamp the cable in a position where the brake pads will actually touch the rim when you pull the lever:

The brake doesn't have to feel perfect yet, because you can use the barrel adjuster on the brake lever to fine tune the brake feel. The same logic applies to shift cables, where you clamp the cable to the derailleur in a useable position, then fine tune the shifting with the barrel adjuster.


The front brake cable was perfectly fine on this bike, but unfortunately the rear was another story:

I will always reuse cables if they're clean and intact, but if they're frayed like this then they need to go. After replacing the cable, I put the chain back on so I can adjust the shifting:

Now the bike is pretty much finished. What's left is to ride it around and fine tune the brakes and shifters.

All in all this was a really easy project. It only needed one replacement cable, but I should plan on replacing the brake pads too since they're old, hardened, and grind the rim when I brake. After that this should be a very capable trail bike. Cheers.

Wednesday, May 22, 2013

Mountain Bike Teardown

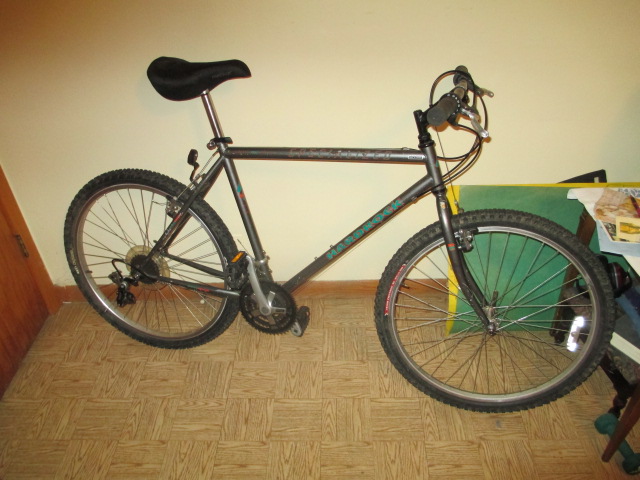
In case you're tired of seeing me restoring old road bikes, here's an early 90s Specialized Hardrock. Most mountain bikes from the late 80s to late 90s are very similar. The better ones have lighter frames and nicer parts, but they tend to come apart the same way. I started this project with the wheels, saddle, seatpost and chain removed:


It's always a good idea to check the rim strips on an old bike, otherwise you might be chasing down mystery flats for a while. This one is nicely intact:

I already repacked the wheel bearings earlier, but here's a link in case you want to know how. My next step was taking the bottom bracket apart:

With the dustcap off, I just used a 14mm socket and ratchet to remove the crank bolt:

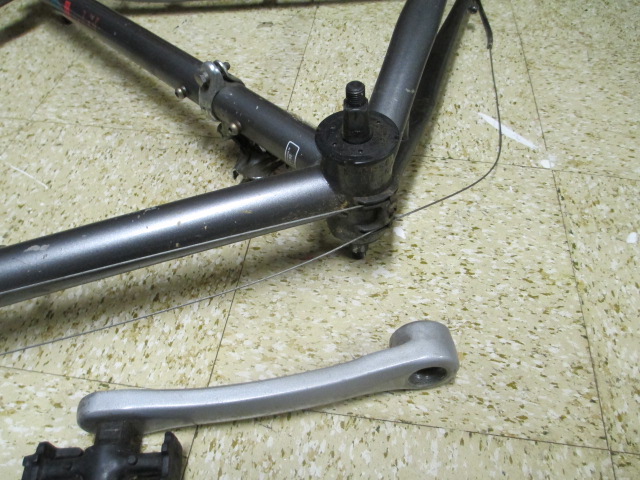
Next I threaded in the crank puller, then removed the right side crank:

Yay:


 Now the left crank (exact same procedure):

Time do deal with those cables. This frame has slotted cable stops, which let you remove the cable from the frame without disconnecting it from anything. Just put some slack in the cable, then pull the housing out of the cable stop:
 

Now I can remove the rear derailleur from the frame:

Let's get back to that bottom bracket now that the rear derailleur won't be resting under the frame. You need to unscrew the lockring on the left side. I have a special tool for this, but you can use a hammer and punch if you don't care as much:

This adjustable cup only has small dimples in it for removal. There's a special pin spanner from Park Tool that you're supposed to use, but this worked too. I just needed to push down while turning the pliers:

With the adjustable cup out, you can remove the spindle. That plastic tube is a grease shield. The bearings were pretty dirty inside, so I don't think it did much good.

To remove the fixed cup, you'll need a nice big wrench. This one comes out clockwise. I suppose the reverse thread is supposed to keep it in place, but a loose cup can still unscrew itself as you ride regardless of which way it's threaded.

Eww:

Now I want to remove the handlebars and fork to grease the headset. Since I hate trying to shove a used cable through a Z-Link connector wire, I'll just remove the brake instead:

It's not a bad idea to do this anyway because you can grease the cantilever studs and make the brakes work a little nicer. After unhooking the rest of the cables from the frame, I can move the handlebar assembly safely out of the way.

The fork is secured  by a threaded bearing race and a locknut. First remove the locknut:

Now the top race can be unscrewed by hand. Keep track of any spacers, these are usually important.

With the race off, you can slide the fork out and remove the bearings.

Now you can clean the bearings, and replace any parts that are damaged or worn out since the frame is pretty much bare now. I like to soak bearings in mineral spirits overnight. This usually dissolves any old grease. I left the cables attached to the derailleurs and brakes to make it easier to adjust them later. I also left the front derailleur on the frame so I don't have to spend lots of time repositioning it. My next post will cover how to reassemble the bike in better working order.